


Hello! I am Naomi from Pine and Party Co and today I want to share a fun Halloween craft that is actually super easy to make!
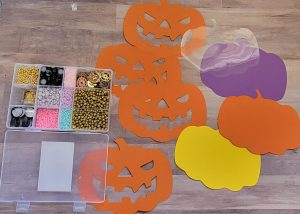
Supplies I used:
- Orange Cardstock
- Yellow Cardstock
- Purple Cardstock
- Double-Sided Foam Adhesive
- Bearly Arts Glue
- Sequin/Glitter/Beads
- Craft Plastic/Acetate
In case you missed it, shaker “toppers” are a big deal right now. I know this because I make cake toppers for a living but I don’t expect everyone is privy to this fact. At first glance, it may look intimidating but trust me when I say it’s easier than you think!
Shaker Topper: a three-dimensional cake topper that has a clear plastic window with embellishments inside, such as sequin, glitter, or beads.
STEP 1: GATHER THE CUTOUTS
 To make it, you will first need to print an image of a jack-o-lantern and cut out 3-4 copies of it with the face cut out.
Then cut out a yellow and orange silhouette of the pumpkin. I also added a purple pumpkin as a border to go around the pumpkin. The yellow is for the inside of the pumpkin and the orange is for the back of the pumpkin.
STEP 2: CREATE YOUR LAYERS
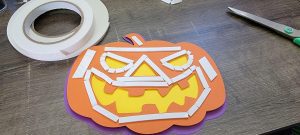 Layer the yellow pumpkin on top of the orange with the double-sided adhesive. This is to make the pumpkin three-dimensional; the more layers you add, the more dimensional it will be.
Next is where the magic happens. This is the part where you assemble the shaker part of the pumpkin. The easiest way I have found to do this is to cut out a long strip of double-sided adhesive tape. Adhere the tape around the pumpkin by cutting small slits along the side of it so it remains one piece but you are still able to bend it around the curves. This is important because once you put your embellishments inside, you don’t want them to come flying out when anyone shakes the pumpkin. If you do end up with any gaps, just add some hot glue to patch up the holes. Now you’re going to layer this like a lasagna. Pumpkin, tape, pumpkin, tape, pumpkin tape. Three times.
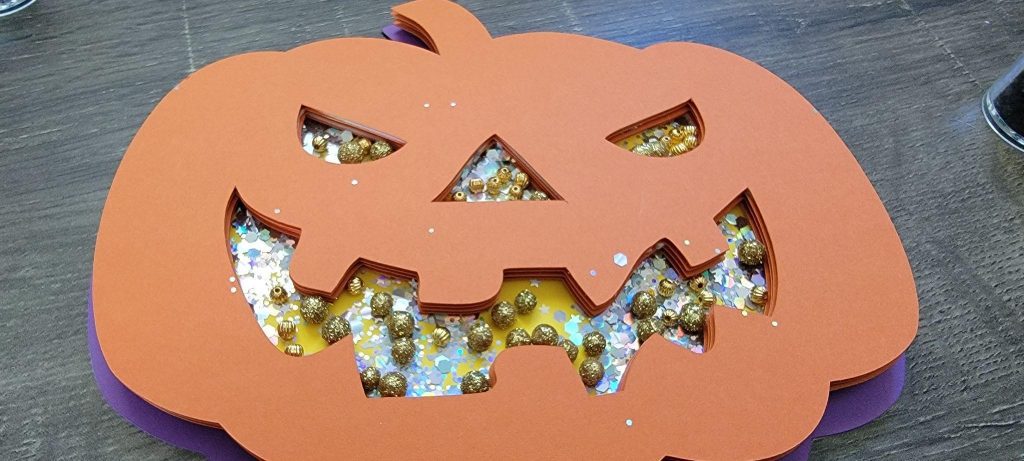
STEP 3: FILL THE SHAKER
Before you attach the last pumpkin, fill the inside! I used gold beads, silver sequin, and black glitter. Don’t overfill it because you want the pieces to be able to move around inside. Once you’re done, glue the craft plastic on top. Wait for it to dry then glue your final pumpkin cut out on top. I love Bearly Arts glue because it has a precision tip that makes gluing tiny pieces possible without the mess and it dries clear. In this project, any glue will work.
 STEP 4: DECORATE
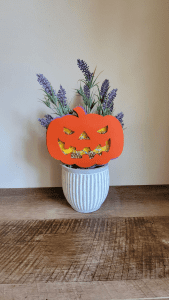 This craft is really versatile! You can insert it into a cake, a plant, a wreath, or just let the kids play with it. It can be made smaller, too, to use as cupcake toppers or add them to Halloween treat bags.
Hope this helps you have a Happy-Creepy-Crafty-Halloween!
Comment on what crafts you’d like to see next and follow me on IG @pineandpartyco to see what I’m making now.


